If you need a list of your current user list and primary e-mail addresses for whatever reason, it’s an easy thing to carry out with Exchange 2010. No powershell required!
Step 1 – Open up the Exchange Management Console.
Step 2 – Go to the “Recipient Configuration” and click on “Mailbox” on the left hand section of the screen. Make sure the columns you want are displayed in the middle.
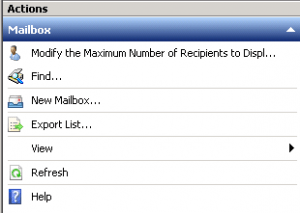
Step 3 – On the right hand section click “Export List”. It will bring up a save file dialog box. It will save it as a tab delimited text file.
Step 4 – You can copy and paste the contents of this file directly into Excel and it will divide everything up into each cell just fine.
If you keep your Active Directory relatively clean you’ll always have an up to date e-mail list to send out when needed, or an easy way to get user lists for the various network appliances that don’t have LDAP connectivity.
It’s also worth noting that a lot of the lists in Exchange 2010 (and probably Exchange 2007) can be exported in this fashion, it isn’t just limited to your mailbox list.
The excellent [SOLVED] enterprise I.T. blog has a post on exporting the email list from the shell. Go take a look at it!

8 replies on “Export E-mail Address List From Exchange 2010”
I’ve been doing this using a much more complex set of steps from the EMS or using the LDIFDE utility. Your steps came in quite handy as they are much simpler, thanks for taking the time to share this.
[…] 3: Aaron Evans over at Workend IT Blog has a much easier method of exporting exchange aliases using the Exchange Management Shell, if you prefer to use the […]
anything like this on exchange 2013?
There could be. I don’t have access to an Exchange 2013 server to know. I do know this pretty much works on all versions prior to 2010 with more or less the same process. Would assume it works more or less the same way with Exchange 2013, but you might have to poke around in the context menus to find it.
Does not export the aliases. Just one email address per mailbox.
It actually will export aliases if need it to. It will export whatever columns you have showing in the list. If you go up into the View Menu, select Add/Remove Columns and have it show the “Email Addresses” column then go through the steps listed above, aliases will be exported. You may have to fiddle with Excel to get it to put them each in their own column if that’s what you need as it treats each column as its own field.
Thanks for the great info.
You need to export a list of mailboxes from an on-premises Exchange server or Exchange Online (Office 365) to a CSV file, for example, to use it with CodeTwo migration software.